Category Archives: Gouache

Gouache Supports, Part 2

Today I continue my thoughts on the various supports I’ve abused with gouache. See Part 1 for watercolor paper, bristol board, and illustration board. This time, we’ll look at Canson Pastel Paper and different types of Claybord. I have a few more supports I’ve tried, so there will be a Part 3 in the not-too-distant future.

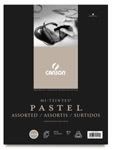
Canson Pastel Paper is a sturdy paper, but it is paper, which means it’s flimsier than bristol, illo board, or watercolor paper. It looks wimpy, and I was a bit afraid to try it, thinking it would disintegrate if it got wet. But I was too tempted by its lovely tinted shades to be deterred. And it held the gouache fairly well. I didn’t layer or scrub very much, and I didn’t use the gouache thickly. I knew it’d crack off the paper if I did. So, with minimal abuse, Canson paper works very well. It curled up and warped a bit, but nothing matting can’t fix.

Work on Canson Paper

Ampersand Claybord comes in umpteen different varieties, each with a unique surface. They are all white clay on hardboard, and are archival, and I love them. No warping! Great absorption! I’ll go through each of the kinds I’ve used.

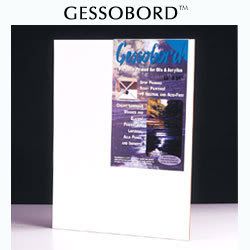
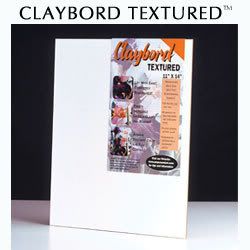
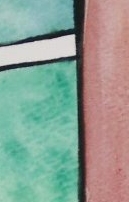
Gessobord and Textured are quite similar. Textured is designed to be more like watercolor paper, and is therefore bumpier, with excellent little nooks and crannies. Gessobord is nicely textured, but fairly smooth overall, with little variation. They both take gouache wonderfully. They absorb quickly, so if you use a wash, it’ll dry slightly faster on these boards than on paper. The downside is that you can’t scrub back to white. But that’s more a concern for watercolor than gouache.

Work on Gessobord

Work on Claybord Textured

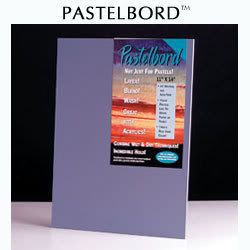
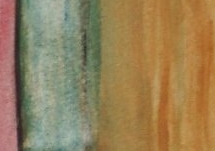
Pastelbord is made for pastels, so the surface feels like fine-grain sandpaper. It’s deliciously fun to put gouache on that surface. I used a bristle brush, and went for the textured, visible-brushstroke look. Pastelbord is wonderful for that. I loved the feel of the bristles on the surface. You won’t be able to get nice, smooth areas of color on it, though.

Work on Pastelbord

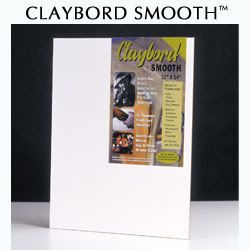
Claybord Smooth is not for gouache. It’s the same with oil paint; you need to put down a few coats to build yourself a textured surface before you can really paint on it. It’s incredibly smooth, like plate or smooth bristol board, but it’s also slick, so it doesn’t absorb paint quickly. The result is that the gouache would rather stay on the brush than transfer to the surface, and you get awful streaks. I haven’t found the patience to figure out how to make gouache work well with Smooth.

Work on Claybord Smooth

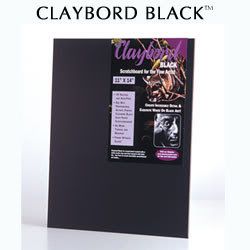
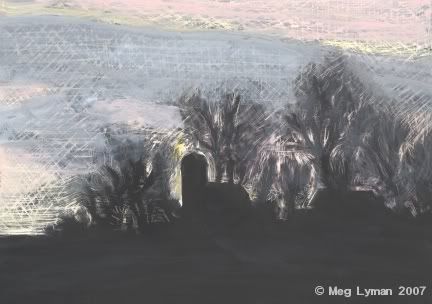
Finally, there’s Claybord Black, my very first Ampersand board. It’s black india ink over a Claybord Smooth panel. It is meant for scratching – but I’ve seen some fine works at WetCanvas of scratchboard with color. Usually they use colored inks, but I thought I’d give gouache a try. It worked OK, but my scratching technique didn’t work well with the way the gouache completely covers the india ink. It’s tough to get it back to a nice, dark black after the gouache has been layered on top. Next time, I’ll try something with definite borders, to see if I can put the gouache in the scratched areas only.

Work on Claybord Black

And, before I forget, I got all my supplies at Dick Blick. Their online store has every type of Claybord product, in any size they make (the physical store has only a limited selection). So here’s my Dick Blick plug: if you want to try out any of these surfaces, consider going through Dick Blick:

www.DickBlick.com - Online Art Supplies

Angry Art

Not the kind that you make when angry, but the kind that makes you angry. Specifically, your own.

This is the first rendition of my brand-new, never-seen-before, Mid Week Post! This new kind of post will feature art that I have worked on since my last website update. Along with the art, there will be content – quality content – that will range from lessons learned to WIPs to bad jokes. Well, bad art jokes, anyway.

Actually, I don’t know any jokes, except the one about the penguin in the bathtub, and nobody buy my sister thinks it’s funny.

*********************

This week’s featured art made me mad. You know the kind – you painted what you planned to paint, but it looks horrible and makes you want to run screaming from the room tearing your hair out because you don’t know why you hate it. Usually this is remedied by leaning the painting against the wall (paint side in) and trying to forget about it for a day or two. That, plus the helpful eyes of others, usually show you the problem. Fixing it may be easy or hard or impossible, but if you can figure out what is wrong with it, at least you can call it a learning experience instead of a total failure.

The Ugly Chickadee:

Ugly Chickadee

The bird and composition aren’t too bad, but those leaves! AARGH! My sister accurately referred to them “flying yam-aliens.” I wanted leaves, not sweet potatoes. So I did the wall thing and got advice on WetCanvas, and tried to fix it:

Better Chickadee

Not brilliant, but I don’t hate it anymore. I just mildly dislike it. I learned from it, and hope someone will buy it. What more could I ask for? Some paintings sell, but the artist never having learned a thing…

Gouache Supports, Part 1

O Gouache, most versatile of mediums, bestow upon me the strength to remain calm and encouraged despite the fact that you frustrate me daily.

*sigh*

Yesterday I spent 2 or 3 hours working and reworking a simple ocean background. The gouache wasn’t behaving. Or maybe I just wasn’t handling it properly. But it brought to my attention that although gouache can be used on just about anything, not all supports are created equal. I was able to spend hours reworking because my support could handle a lot of abuse.

I’ve used gouache on a bunch of different supports. Specifically, nine, with one waiting in the wings for its debut. Ten supports are far too many to rate in one blog entry, so this week you get half of them, hence the “Part 1.” I won’t go into too much detail here, so if you want more info, let me know!

First: Watercolor papers. Most of the advice you’ll find says to start off with watercolor paper. Good advice, but “watercolor paper” has a bunch of variation. I’ve tried three kinds.

Strathmore 400 Series Cold Press: I’ve only tried the blocks. They come in weird sizes, like 13×17″. They’re toothy and durable. The surface is fairly rough, and the gouache tends to puddle and granulate if too wet. It scrubs well, and can take a fair amount of abuse. The paper buckles even in block form. Strathmore’s Aquarius II paper is smoother and more flexible, but although the packaging says you don’t need to stretch it… it still buckles under a wash.

Work on 400 Series
Work on Aquarius

Arches Cold Press Cotton Rag: This paper holds gouache very well. I toned a piece months ago, and it stayed relatively flat. I painted over it with great success. I had to lift a few times to fix mistakes, and the toning didn’t lift, just the new paint. I didn’t scrub much because of the toning, but I bet the paper would handle it well. My only complaint is that it buckled a bunch… but then again, I didn’t stretch it first.


Work on Arches Cold Press

Sennelier Hot Press Cotton Rag: Another great gouache support. It’s a verrry smooth paper. I have a small landscape-shaped block, and although I used washes and wet-on-wet, it didn’t buckle at all. The gouache responds very well to brushwork on this paper – it blends more than lifts, which is a breath of fresh air. I haven’t found a downside to this one yet.


Work on Sennelier Hot Press

Bristol Board
: I’ve worked on Strathmore 300 and 400 vellum and smooth. They’re both very smooth surfaces, and work well with one opaque application of gouache. The final result looks very smooth and velvety. Bristol board can’t handle washes or large applications of color – it just curls up. Because of this, I’ve only done a few color tests on it, so I don’t have any finished works to show you.


Crescent Illustration Board: Make sure you check out the link for this one. It is an awesome matrix of all of Crescent’s flavors of illo board and their compatible media. I have used #300 and #1. The #300 is single-sided, and it is nice and sturdy. It reworks pretty well, but I didn’t test its scrubbing capability. It warped severely under a wash, but didn’t buckle. The #1 is excellent. It warps just a tiny bit. It’s very thick, so it can handle a lot. It reworks very well. Crescent rates these boards “marginal performance” with watercolor and gouache, but in my opinion, the #1 is better than the #300, and both are pretty darn good. Plus, the #1 comes in 22×30″ sheets that you can cut to whatever size you like.

Work on #300
Work on #1

Well, that’s it for this week. I’ll post “Part 2” next month.

Guinness and Gouache Portrait WIP

How could I keep a blog about dark beer and not include Guinness? When I was first introducing myself to beer in general, Guinness was the only dark beer I knew. My first pint was an entirely new experience. I won’t go into the Guinness details, since most people are likely to know them already, and if not, go here.

Guinness will always have a place in my heart, but after having tasted so many other dark beers, it doesn’t stand out. It’s smooth, and actually quite bland compared to some. It’s a drinkable beer – you can have it with dinner – as opposed to some that are an experience, or a dessert, by themselves. Rating:

M: 7
N: 7

**************************
Gouache Portrait WIP – the last installment, I promise

This is simply a visual step-by-step of my portrait of Grandpa. Other than the toning wash, all the steps show opaque application with very little blending. The background was done with layered washes, dabbing, and a sponge. The illo board I worked on curled up after the first wash, so the photos are a bit distorted. It is also why the first picture includes a beer bottle.

And the final result: link

Stoudt’s Fat Dog Imperial Oatmeal Stout and Gouache Portraits

Stoudt’s Fat Dog Imperial Oatmeal Stout is this week’s excellent beer selection. It is excellent because there is a fat dog on each label. Also because it is sweet and delicious. Its taste is reminiscent of the perfect oatmeal cookie. One sip and the flavor fills your whole mouth. Swallow and a slight tangy aftertaste fills you with nostalgia, making you long for another mouthful. I can see how it got its name; I could drink these all day and end up 1) drunk as a dog and 2) fat as the dog on the bottle.
Ratings:

M: 9.5
N: 8.5

*********************************
Gouache Portraits

The weeks-long activity that I wrapped up last Friday encompasses all my experience with gouache portraits. Here is what I have produced:
I’m fairly happy with it, in that naive-new-to-a-medium (gouache) and -genre (portrait) way, and will probably hate it for its blatant shortcomings once I grow into a good painter. Even now, having learned from the process, there are a few things I would change.

I finally got the likeness right and transferred it to Crescent illo board. It was mounted on thin backing, and as soon as I laid down the toning wash, the board curled up. Also, the wash obscured a few of my pencil lines. Lesson 1: use thicker board. Press harder on transfer.

I mixed up the mid-range skin tones and painted those in. I wasn’t careful enough and later found a few spots that were missing paint. Luckily the toning wash showed through (instead of white board). Lesson 2: Mix up more paint than you need, and keep the leftover dried-up mess handy until the very end. Also, keep each mixed color in its own well.

Once I was done, I was planning on blending some of the color “tiles” by softening the edges. I have found a tiny amount of info on the Internets about the gouache “tiling” technique, and thought I’d try it. Instead of nicely blending two adjoining tiles together, all I did was lift up the paint and make a mess. Luckily I learned Lesson #2 early, and had some paint to cover my ass. I still have no idea how tiling works. Lesson 3: Practice techniques before using them for something important. It’s hard to cover mistakes in gouache.

I took photos of each step along the way. I’ll post those next time… after the holidays. Merry Holidaytime, everyone!

Shiner 97 Bohemian Black Lager and Gouache Underpainting, Part 2

Most of the beers I’ve posted have been good. Time for a disappointment. Although it is not a stout or porter, we picked up Shiner 97 Bohemian Black Lager because of the word “black.” Some very good dark beers are labeled simply as “black,” not stout or porter. But this beer really is a lager, and has almost no dark beer qualities. It tastes just like a light beer, but with heavy undertones. Conclusion: although it might be a good lager (I don’t really know), we won’t be buying it again.

M: 4
N: 4

************************************
Gouache Underpainting, the Final Chapter

I admit to being a complete newbie when it comes to 1) painting 2) color and 3) portraits. So I really didn’t know what I was doing. I chose some colors that I thought would make a good skin tone, and mixed them willy-nilly. I ended up with a color that would look good on a tropical parakeet… but I wasn’t going to throw out all that paint. So forgive the ultra-tanned sheen that makes Grandpa look like he’s a snorkel instructor in Tuvalu.

I attempted to paint over Left Grandpa. I mixed four values with this shade, but added some blue into the darks for a more interesting contrast. I mixed a few shades of suit and hair color as well. And I painted over.
I forgot to paint the glasses. Anyway, You can see that on the face, the underpainting didn’t show through at all. I used opaque mixes for the face, and although the underpainting was a good guide, it didn’t do much else. It was great to paint on something other than white, though. On the suit, I used a much more transparent mix, and the underpainting showed through.
Here are some of the techniques I used. You can see the results – not too great. Dry brush looks terrible. Add water and it gives nice texture. Scrubbing an area lifts like nobody’s business.

So I learned how to make it work, but didn’t much like the results. Lesson: if you make the second layer transparent enough for the underpainting to show through, it tends to lift. Therefore, my actual painting of grandpa will use a watery wash as the underpainting, so I am not painting on white. From this experiment, mostly I learned what not to do.

Terrapin Coffee Oatmeal Imperial Stout and Gouache Underpainting

Is it just me, or are these beer names getting longer?

The Terrapin Beer Company is local to Athens, GA, and regularly sends its “limited edition” brews to the local stores. After we first tried Terrapin Coffee Oatmeal Imperial Stout, we fell in love with it, and were devastated when the stores discontinued it. Well, last week, it was there again! Woo!

This beer was the First Place winner at the Atlanta Cask Ale Tasting in 2005 and People’s Choice winner in 2006, and for good reason. It’s one of the very best beers we’ve tried. It’s expensive, but delicious. You only get 4 for 8 bucks, but it’s worth it. It tastes like a chocolatey coffee and a home-baked oatmeal cookie put together. It has no bitterness and no bad aftertaste. It’s brewed with coffee. Mmmm. Therapeutic.

M: 10
N: 9.5

************************************
Gouache Underpainting – Part 1

This was an experiment in underpainting, to learn the dos and don’ts. As such, it doesn’t look very pretty. But I learned from it, and I hope you do too. Also, it’s too long to post all at once.

My excellent Grandpa passed away when I was in college. He was a great man whose personality and good deeds I didn’t fully learn about until people spoke at his funeral. Grandma still misses him a great deal, so I’m paiting a portrait of him for her. Do not tell Grandma or it’ll ruin her birthday surprise. Thank you.
I traced Grandpa’s bust onto cheap illo board with a light “table” I rigged with a desk lamp, textbooks, and a piece of glass. The outlines were very rough and simply showed the major value areas. Then I painted the values with one hue. For Left Grandpa, I mixed grey-blue and cool green. For Right Grandpa, cool red and warm green. I added white in various amounts to get a total of four values. Neither of these are a very good likeness, but that’s fine, since this is a value experiment.
I liked how the values turned out. They showed the form well. Using monochrome values was very useful to me because it’s what I’m used to with pencils. Even if I don’t use an underpainting in the final portrait, I will use these value studies to help. They were great learning experiences in themselves.

The conclusions: next week!

Bison Chocolate Stout and Gouache

Welcome from sunny, cool Georgia.

Last weekend N brought home a repeat favorite, Bison Chocolate Stout. The first place we tried this beer was at a Ted’s Montana Grill. I gave my beer order first, and N followed with the same, and then every other person at the table ordered one… except the other girl. Anyhow, it was good enough to pick up at the Beverage Resort a few times since then.

Bison Chocolate Stout is fairly unique. Other stouts often make me think, “Tastes similar to stout X.” But this one doesn’t remind me of any other beers. It tastes very much like dark chocolate. The cocoa flavor is a bit bitter, just like a Hershey’s Dark. But it also has a nice bite and tang. Overall, a unique, chocolately, well-rounded beer. Ratings:

N: 8
M: 8

***********************************

I use gouache. A little-known type of paint, gouache (pronounced “gwash”) is an ornery, interesting medium. It’s essentially opaque watercolor. The cheap gouaches are simply watercolors with chalk added, and the good ones just have more pigment (slightly coarser than watercolors). Many artists haven’t heard of it, or if they have, they say, “why on earth are you starting with that??” They know that it’s a difficult paint to work with… but it can also do amazing things. I chose it because my favorite wildlife painter Carl Brenders uses it. Google him and you’ll see what can be done with gouache. I have prints of his hanging in my home that people always mistake for photographs.

But a good artist can do wonders with any medium, so once I tried my gouache I found out just how good Brenders is. Gouache is unfriendly. Handprint.com (a great watercolor website) says that the word “gouache” is derived from the Italian for “mud,” which is very fitting.

Gouache can be used like watercolors, in wash form. It gives neat texture effects because of its coarse pigment. It can also be used thick, with only a little water added or straight from the tube. Either way, the most difficult thing about using it is its tendency to lift. Good for correcting, bad for layering. Layering can work, but if you scrub, it’ll lift all the layers of paint below and turn into mud. It also gets streaky.

My example: a recent painting of a cat. This photo shows a work-in-progress.
If you’re wondering why the cat has only one eye, it’s because I’m honoring my sweet little devil, Kali:
Anyhow, notice the ugly, dead-looking strip to the right of the window frame. That had been layered in several washes, initially the same orange-ish color as the rest of the wall, then in blue for shadow. I scrubbed too much. It looked like crap, so I got it wet and lifted the paint off (blue-ish stripe):
I didn’t pay much attention to whether the colors I was mixing were both warm or both cool, which added to the mess. The strip to the far right looks OK. The brownish strip between the two looks like mud. Bleh. Here’s a view of how washes can work:
The green is a single color wash and the red is a layered mix. Both look fine.

Then there’s the opaque applications. These can look good if the paint consistency is right and you do it in one pass (see purple below, notice difference between red wash and purple opaque):
But if you go over an opaque area again with another opaque application, even if it’s totally dry, you’ll probably get a mess. I used the same color to go over another purple area again, and it turned streaky, lifted some of the paint, and sort of un-mixed (see blue smudge):
This may also say something about my mixing abilities. Anyhow, gouache has this lovely property that the more paint you put on an already-painted wet area, the lighter it gets. No matter how much you have on your brush, painting into a wet opaque area lifts. Like trying to write over a dry-erase mark on a whiteboard. Frustrating.

Lesson: Play with gouache to learn it. Wait for it to dry to touch it up. Learn from mistakes. Don’t get frustrated. After all, artists have done fabulous things with gouache. And once you’ve mastered it, everything else will be easy. You might also be 300 years old by then, but hey.